Showing posts with label Helpful Ideas. Show all posts

Help for the First Days of School

As much as I wish summer could last forever, it seems as though 'Back to School' season is officially upon us! I have meetings starting next week and then our new little batch of sweet smiling faces will join us the week after that. It's such an exciting time for teachers, but with it also comes feelings of anxiety and stress. 

We all have heard that the first few days of school are the most important. I've written about this on our blog a few different times  here and here. It's a scary job knowing that we need to make sure to teach our students our expectations starting on day one if we want to have a successful year.

For this reason, I have created a new resource:


I have to admit that this was something I never intended to make. My goal was to give all our wonderful blog readers (you!) the tools they needed to create their own set of rules, classroom management system, and list of procedures. But after 4 years of people asking me to provide them with an editable version of my old PowerPoint presentation, I finally gave in after I read these two sweet comments: 


For the first time, I realized that I could save teachers a WHOLE lot of valuable get-ready-for-scool time if I could create a version of this PowerPoint that was ready and easy for teachers to fill in on their own.  So that is exactly what I've done. I've created a cute, kid-friendly PowerPoint template that is editable. You simply follow my prompts to create your own set of rules, management system, and procedures list and adapt it to fit the needs of your own classroom.

Here's a peek of what's inside:


And here's a little note I added that will give you some extra information about this resource:


Just to answer some more of the questions you might have, here is some information you might be wondering about:

This resource will be extremely helpful to you as you create your own classroom management plan and develop your own set of classroom procedures for the coming school year. This PowerPoint has two purposes: 

1) To be a guide and walk you through the important classroom rules and procedures you should be teaching your students during your first few days of school.

2) To use in your own classroom as a PowerPoint to help you teach your students all about your management system classroom rules, and procedures. 

I hope you will find it useful and I hope it will be a huge time saver for you! 

This document will help you:
-Explain why rules are important
-Identify and explain your classroom rules
-Establish a classroom management system
-Discuss positive and negative consequences
-Create ways to offer positive reinforcement
-Describe what a procedure is and why they are important

These procedures have been included in this download:
-How to sit in the chair for learning
-How to come in to class
-How to walk in the halls
-Procedure for going to the bathroom
-Procedure for getting a drink
-How to sharpen a pencil
-Procedure for asking questions
-How to get the attention of your students
-Procedure for early finishers
-Procedure for turning in homework
-Procedure for dismissal
-What to do when absent
(I have provided extra pages for you to add anything that I may have missed.)


I wish every single one of you a happy and successful school year!! Good luck as you all go back to school!!


If you have any more questions 
or comments or words of advice 
for the first days of school, 
please leave them in the comments! 

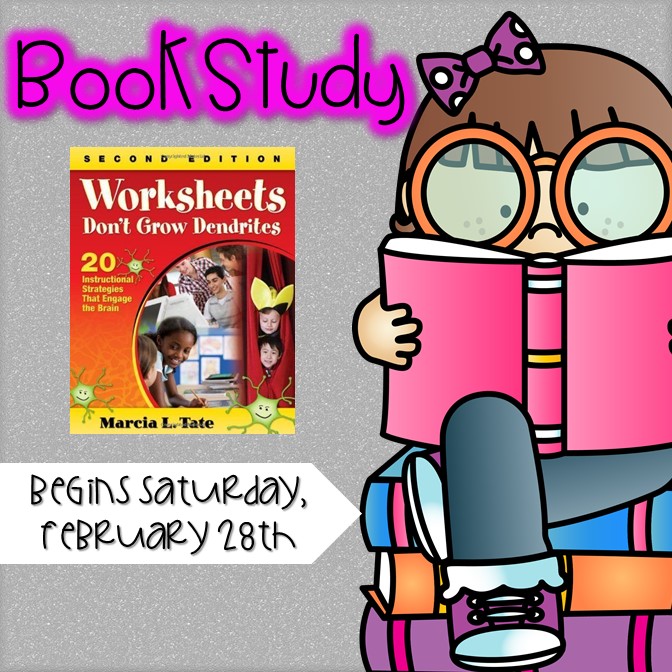
Book Study: Work-sheets Don’t Grow Dendrites, Starting February 28th!


bookstudy
Get Ready to do some on-line professional learning with some of your favorite bloggers! After visiting the Ron Clark Academy, so many of us are so inspired to find ways to reach our learners in fun and exciting ways! Starting February 28th, we are going to be hosting a linky party each Tuesday and Saturday with chapters from this book: Worksheets Don't Build Dendrites.


Linky parties will take place on these different blogs each time. Here is the order so you can plan accordingly :)
Kickin it in Kindergarten- Chapters 1 and 2 (February 28th)
Mrs. Wills Kindergarten- Chapter 3 (March 7th)
Queen of the First Grade Jungle Chapter 4 (March 10th)
Fabulous in First Chapter 5 (March 14th)
One Extra Degree Chapter 6 (March 17th)
Mrs. Jump's Class Chapter 7 (March 28th)
The First Grade Parade Chapter 8 (March 31st)
In April, you will be visiting these girls for the remainder of the study:
Mrs. Ehle's Kindergarten Chapter 9 and 10 (April 4th)
What The Teacher Wants Chapter 11 (April 7th)
First Grader At Last Chapter 12 (April 11th)
Erica's Ed Ventures Chapter 13 (April 14th)
KinderGals Chapter 14 and 15 (April 18th)
A Rocky Top Teacher Chapter 16 (April 21st)
Mrs. Wills Kindergarten Chapter 17 (April 25th)
Little Warriors Chapter 18 (April 28th)
Falling Into First Chapter 19 (May 2nd)
Kickin' it in Kindergarten Chapter 20 (May 5th)
You can join in for whatever part you like! If you are not a blogger, that is OK! We will want you to join in on the fun. You can participate in the conversation in the comments or on our social media outlets.
Follow us on Instagram (@whattheteacherwants)
or


 We want this to be a positive collaboration between teachers! The whole point is to encourage each other with inspiring ideas while still using research-based best practice.
We hope you will join! Here is a YouTube video where you can hear a little more about what the book is about.
wokrsheet

Classroom Supplies

I've decided to re-post a couple of things that I think you might like! :) It's Throwback Monday today!  I of course included a new download!


As tough as the economy is right now, it's difficult to find money to buy everything you need/want for your classroom and for your students {in my district, we're not allowed to send home a supply list and the beginning of the year}.
This idea is for a "Donation Door"! Thank you to Lisa {a kinder teacher at our school} for the idea! Your door can be geared toward a theme...My classroom theme was bugs and so my door matched my classroom.  This door is great for the first day of school  and also for Back to School Night.   Ideas for donation items:
*Baby wipes
*Ziplocks
*Clorox Wipes
*Address labels
*Pencils
*Erasers
*Germ-X
*Markers
*Glue Sticks
*Colored Pencils
*Batteries
*Play-doh
*Prizes
*Picture/chapter books
*Puzzles

Donation Door


Parents will take off the item that is attached with velcro to the bug. 
(This ensures you don't get doubles of anything you don't need)


{This is the explanation sign that goes on the door}


Click
{here}
 for the posters, clipart, and explanation for the Donation Door
                                            Click {here}
for the Donation Door labels


Could you use this in your classroom?

The Mitten

Do you feel a little down?  Maybe a little blue?  Or just a tad depressed after the holiday hustle and bustle?  Well...I have just the thing to cheer you up! More ideas! I have wanted to revamp my winter unit for quite some time now.  I found Jan Brett's website and I just loooooooove it.  I printed, cut, laminated and attached a popsicle stick to the animal masks from "The Mitten" and my class and I are going to retell the story by using the masks and acting out each of the part.  I am going to use a white sheet as the mitten and my students will have to crawl in it as we retell. 


 Then, we have a little creative writing activity where the students have to think of a different animal to crawl into the mitten and tell why.  The mitten is made with scrapbook paper and cotton balls.  Underneath there is a surprise!!!!  Here is my example...


Clipart and/or fonts copyright DJ Inkers and used with permission: www.djinkers.com
Click HERE for the writing activity.  Click HERE for the mask downloads from Jan Brett's website.


Need more ideas for January?
Here's what's next!

This unit is perfect for Kinder, 1st, and 2nd Graders!
This mini-unit is a perfect way to teach your students about Martin Luther King, Jr. and all of the great things he did for human rights. 

This unit is for K-2!


Click {here} to check it out!


Do you teach grades 3rd, 4th, 5th, or 6th? Then this unit is perfect for you!

Want to read about what this pack includes??


This unit is perfect for any upper grades classroom {designed for grades 3-6} and will be a fun way to do some great learning about an important time in American History.

Word Families

We are working on the {__AY} word family and I made this Christams tree to help us out. The {__ay} word family is on the star and the students cut out the ornaments and write a word that ends in {ay}. Then they can decorate their ornament and glue it on to the tree. This is an example of what it might look like when finished. I only have the students do 4-6 words. If they would like to do more....OF COURSE!

Click HERE for a download of this activity.

Magic Scrap

I definitely didn't invent this, and you've all probably heard of it already.
If not, keep reading.

Right before the end of the day, our floor is always a mess! The perfect solution...
MAGIC SCRAP!

Look around the room and find one or two pieces of paper (or a crayon, or a pencil...), laying on the ground. Call out, "Magic scrap!" Your students will immediately drop to the floor and begin picking everything up. Whoever finds the magic piece gets a small prize.

It's the best way to get your floor clean in seconds!

Parent Volunteers

I love my parent volunteers! At the beginning of the year, the parents are able to pick a time to come in to the classroom and work with students or do miscellaneous projects to help me each week.  I just want to show you how I organize what I want them to do. I keep the items (lamination cut outs, cutting projects, or testing materials) in bins organized by days of the week. If a parent comes in on a Monday he/she can check the Monday bin to see if there is any work for them to do right when they come in. Sometimes I don't have anything in there, that means I have something more specific for them to do.
I also have volunteers who help from home. I send home a "work bag" with something I need for them to help me with. I  include all the supplies needed with a note explaining what I need them to do and when I need it back to school by. I usually give them at least a week. Then on my own personal spreadsheet I have all of my at home volunteers on a list. I make sure to mark by their name what I sent home and when it is due. This ensures the parent doesn't forget to send it in and I make sure that I am not sending home tons of stuff with just one parent.
Work bag

Free Stuff!

Every teacher likes free stuff, right?! Have you ever thought what you’d like to get for your classroom if you could afford it? Would it be technology? Books? Or even just some extra basic supplies? Read on to find out how you can get free materials for your classroom.
I was introduced to this awesome website about four years ago. Since then, I have received a total of 5 (FIVE!) grants from this website. The best part about it: IT'S SUPER EASY! It honestly takes me an evening, just a couple hours, to write a whole grant.
Sometimes when I share this information with teachers, their reply is, “I don’t have time for things like that,” or, “It seems too complicated,” or even, “No one would donate to me.” But honestly, take it from someone who has received almost 25 hundred dollars in materials for my classroom, it is not too difficult.
Here are the steps:
2. Sign up for a teacher account
  • Click create a project
  • Click get started
3. Write your proposal
  • Create a name for your project
  • Go shopping
  • Follow the prompts to write your essay (a series of questions that help explain what you need and why you need it)
4. Press submit
  • Then all you have to do is wait until someone donates money to fund your project. (Sometimes it takes up to 6 months for a project to be funded. Don't get discouraged if it doesn't get funded right away.)
Here are the projects that I have had funded:

LCD Projector: $823.17

Literature circle books: $264.63

Chemistry supplies: $559.76

Shakespeare for Kids books: $300.00

A class set of books on Ellis Island: $465.83
Total: $2,413.39
Good luck and happy grant writing!

Behavior Management

Management in the classroom is a crucial part of a classrooms feeling of community. It is important to have enough structure in the classroom where each student is able to learn, but also where they have enough freedom for choice and are able to manage their own time.  I love positive reinforcement.  Probably about 30 times a day I say things like "I love how "student name" is standing in line." or "Look how great "student name" is doing on their work."  All of the other students just thrive for me to say something to me.  I try to say something positive out loud to the class at least once to each student a day.  I don't just limit it to my students. I make sure to positively recognize  any student in any grade that I see following the school expectations.  :)
Here are some motivators I use:
*Table points -I watch for tables doing things quick, quietly, or nicely. At the end of the week the winner gets a special prize.
*Brownie points- This is a whole group behavior management.  They can earn a brownie when they are quiet, working nicely, helping each other, etc. Click {here} to see more.
*Behavior Hole Punch- If a student has stayed on a green card all day (I use the green, yellow, red pull card system) then at the end of the day the can get a hole bunch on their behavior chart.  After 220 hole punches, they get a class applause and a prize from the drawer. To download my behavior hole punch, click {here}.
*Power Pellets -Anytime I call out "Power Position" the students have to stop what they are doing, fold their arms, and look at me.  The first one to do so quietly will get a Power Pellet (aka, one skittle). You can download a cover for the power pellets {here}.
Power Pellets (skittles) jar.

*Smarty Pants tickets -If I catch a student doing something great, I will give them a ticket and at the end of the week I draw 5 from the Smarty Pants and those winners get to pick from my prize drawer.  Then we start over next week.  Here is what one Smarty Pants ticket looks like.  I always announce: "John is getting a Smarty Pants ticket because he was so nice to help another student pick up their crayons".   The student puts their name on in and puts it in the Smarty Pants (I actually have a bowl that is shaped like pants).

Click {here} to download the smarty pants tickets

This is where the students put their ticket. My student teacher gave it to me! It's from the game, Ants in My Pants!


Thank you to my mentor teacher in my Student Teaching who gave me the "Smarty Pants" ticket idea.  A shout out to my elementary school's 1st grade team who introduced me to "Power Position" and "Power Pellets".  Way cute!


Fonts: Kevinandamanda.com
Clipart: scrappindoodles.com
Frames: Print Candee

Centers

I really do believe centers should be directed by student choice.  My student's learn time management, discipline, and self-structured learning.  My 1st graders love centers and I love them because I can do guided reading groups during that time and the centers reinforce topics we have learned in class.  The BEST part about choice centers are that they are differentiated.  The high level students can elaborate on each center and expand their learning and the lower level students can do as much as they can and are able to practice concepts they might not have down yet. Find someone on your grade level that feels the same way you do about centers and work with them.  I teach with another girl on my track and we work together on coming up with new center ideas.  Basically is makes half the work for the both of us!  Ashlee...YOU ROCK!


Click HERE for centers board download!  Click HERE for planning sheet download!


Here are the basics:

*There are 15 centers (or more, or less-depends on you and your class)

*Centers are placed around the classroom in bins and are labeled with a picture.
An example of the center bins placed around the room.
*A matching picture is placed on the board (center board) so the students know what centers are available (sometimes you won't have some centers running each week).
Center Board


*Each center picture on the center board will have either a green dot or a red dot next to it.  EACH DAY-The students must do 2 green dot centers (example: spelling, wordwall, math) before moving on to a red dot center (star center, file folder games, art, puzzles).  This motivates the students.  -A student does not have to move on to a red dot.  They can continue on green dots.  Think of the green dot centers as "must do" centers and the red dots as "can do" centers.
*In order to go to recess that day, the student must at least complete one green dot center that day. Remember the expectations are for each day.  They are expected to complete 2 green dots before they go to a red dot THAT DAY, not each week.
*If a center only has 4 bag (example: bag of alphabet cards), then only 4 students can use this center. You will indicate this on the center board above the green/red dot.  You will simply write a 4 above it.  This tells the students that only 4 students can go to this center at one time.
*Centers are independent in my classroom.  I teach them what independent work looks like and sounds like.  If they have a question and I am with a reading group, they are not allowed to interrupt the group.  They must ask the center inspectors.
*Center Inspectors are 2 students who know what to do on each center.  They can answer simple questions students might have (How many words do I have to write on this, how do I glue this...? etc).  They also check the centers at the end of the day and let me know if I need to make any copies or need more supplies for any centers.


Frequently asked question:
How do you make sure the students are doing the center correctly?
Each center has a way that I can check their accountability.  Every center is hands on, but after the hands on part is completed, the student needs to document what they did on either a worksheet or in their center journal (Usually just for green dot centers).  The center journal basically has 20 pages double side of handwriting lines in a folder.  For example, in spelling center this week, the student will write the spelling words in rice. When they finish, they will write the spelling words in their center journal.  If the student has to write something in their center journal because there is no worksheet, I will put a star next to the color of center it is red/green. When the bell rings to go to recess, the students will clean and make sure their centers are on their desk.  I check the center off just by glancing at it.  If I check them off, they put their center work in the "center basket" (just a drawer).

How do you get started?
Remember, choice centers are all about procedure.  The students need to be trained.  I train them for about 3 weeks before I even start the centers. 


When do you change the centers?
Every 2 weeks.  I introduce on Wednesdays, Thursdays, and Fridays.  I will intro 4 centers on Wednesday, 4 on Thursday, and 5 on Friday.  Most of the activities the students are familiar with and I always give them an example and show how to do each center.

Do you grade the center work?
NO!  That would be so much work and you really are just practicing each skill and trying to reinforce concepts.  I do make sure the student is doing the center correctly.  I go through each center worksheet/journal after they turn them in to the "center basket" each day. 


What about behavior management?
Centers are a privilege and the students know that.  They practice behaving in the center before they even practice the center.  The students are usually so actively involved and they work very hard on their centers.

What if a student does not finish a center that day?
If it is their 1st green dot, they must try to finish that center while the other students are at recess.  If it is their second green dot, they may go to recess, but put their unfinished center in their center journal folder to finish tomorrow.  Yes, this green dot can carry on to the next day.  If it is a red dot that they did not fully complete, I have them finish 2 green dots the next day before they can finish that red dot from yesterday. Get it? Wow!  That's intense.

Does everyone start centers at the same time?
No.  Centers are stagger started by first having 3 review worksheets that each student must complete before they go to centers (this is where their time management skills will show). The worksheets are usually: 1 spelling review, 1 math review, and one language review that goes along with our them that week (this weeks theme is friendship) At first, it is quite difficult for a few students to manage their time and that is why we practice.  For 3 weeks at the beginning of school, we do 3 workshops and then if they finish early, they get to play a game.  This motivates them to finish and they then recognize what pace they need to keep in order to finish.


Here is my center planning sheet.  Each time I switch a center, I write it down so I can have that idea for next year! The pictures next to the center name are the same I use on the bins and on the center board!


*A huge thank you to Carrie, my sister in-law who helped me start up these wonderful centers that she also did in her classroom.
*A BIG thanks to Ashlee, my partner in crime, for making the centers what they are today!

Glue

GLUE! Do you have a love/hate relationship with glue in your classroom or at home?
  
It's great for art projects or review worksheets, but it is always clogging! I get quite frustrated during every project using glue because I am spending most of my time with a thumb tack  in my hand digging out hard glue clogged in each bottle!  I have a great tip for you! Just use oil in the lids. Here is a tutorial. -Thank you to my student teaching cooperating teacher who gave me this tip a couple years ago!


Disclaimer:  This does not work miracles unless you teach your students to take care of their glue bottles. You'll just notice that your glue will clog much less (if at all!) and will be easier to un-clog if it does! I honestly have NO problems with my glue ALL year- as long as my student close their glue and wipe off the top. 


1. Take the lids off of the glue bottles.


2. Put the lids in a bowl and pour oil over them (I use vegetable oil because it's cheap) and stir up the lids so they get oil inside of them.


3. Rinse (don't wash) off the lids.


4. Dab the glue lids dry (don't wipe all the oil off). You can leave them out to dry if you want.


5. Put he lids back on.


I usually buy my glue on Amazon (affiliate link) HERE. 

More glue options here:

Related Posts Plugin for WordPress, Blogger...